A Faster, Better Way to Detect Network Threats
OCI protection groups secure your most valuable assets and improve your threat hunting.


When using any security tool, it is vitally important for it to help you to find a threat quickly. For most tools, there is a learning curve before you can use the tool effectively, as well as a period during which the tool is tuned for the specific environment in which it is installed. In an ideal world, these processes would take a short period of time to complete, and the tool would then be effective in finding security issues on the installed network. In reality, this is an ongoing process, with the user continually learning how to operate the tool more effectively and tuning it to better detect threats.
NETSCOUT’s Omnis Cyber Intelligence (OCI) product helps to streamline the tuning process by providing many ways to categorize systems on your network. One of these ways is the idea of a protection group.
What Are Protection Groups?
A protection group is a list of servers or other systems on your network that logically perform similar functions or access similar resources. This allows OCI to gain insights into these workflows and gain visibility into their security risks and threats. An example would be to create a protection group for all of your web servers and another for all of your database servers. Another example would be to create protection groups for different parts of your organization, such as HR, legal, engineering, sales, and so forth.
Protection groups can be defined as a list of individual IP addresses or as subnets such as 192.168.1.0/24. Each protection group can include multiple IPs and/or ranges of IP addresses. You can even have overlapping IP ranges for systems that are part of different groups.
How to Create a Protection Group
To create a protection group in OCI, select Device Configuration from the All Modules menu. Select Protection Groups on the left side of the screen and then the “+” sign on the right side. Add a new entry, give it a meaningful name, and save it. Repeat the process to add more entries. Once you have done this, you might see something like the following:
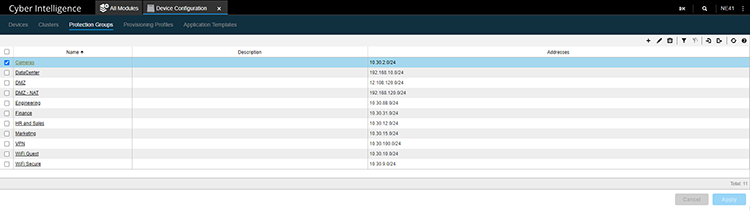
Here, we have created several groups of users with different IP ranges that can be used to limit the search results in OCI.
How to Use a Protection Group
Once you have created one or more protection groups, you can filter on just this traffic very easily. Select Network Visibility from the All Modules screen, and you will get a list of all of your protection groups down the left side of the screen. You can select one or more of these protection groups at a time to see the security risks, threat indicators, and other pertinent information about the different groups selected, as shown below:

Here, we’ve selected just the DataCenter and DMZ – NAT protection groups to focus on, because there are risks associated with those groups. This allows us to quickly find the relevant risks associated with high-value assets.
Conclusion
This is one of the many features available in NETSCOUT’s OCI product that makes it a powerful tool to use for threat hunting. By spending a few minutes creating protection groups for your high-value assets, you can increase the speed in which potential threats are discovered, improving the efficiency of your analysts and protecting your assets more effectively.
Learn more about how application and network performance monitoring solutions are critical for your infrastructure.